Friday, 23 January 2009

RUSSIAN EDGE SHAPE NAILS


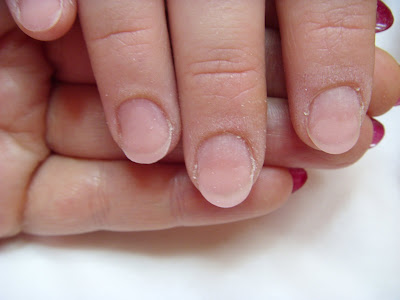
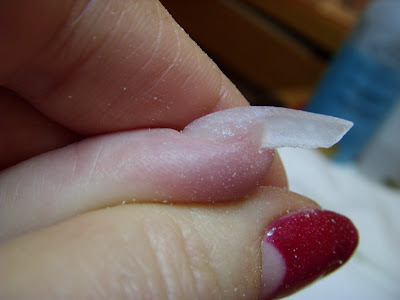
I did these nails recently after seeing the style on a Russian nail forum. I was inspired to have a try at the new design which is apparently all the rage in Russia. Its a comfortable shape to wear which is quite flattering to the hands and it is also very strong with the ridge reinforcing the shape vertically. Nice to try something different.

RUSSIAN EDGE SHAPE NAILS


After prepping the nails and priming I apply a bead of Nail Architecture acrylic in 'deco pink' to zone 2 of the nail and feather into zone 3.

RUSSIAN EDGE SHAPE NAILS


Now I apply some clear acrylic that is mixed with some opalescent glitter dust. The mix ratio is 1 part glitter to 3 parts powder. Again this application is feathered into zone 3 to create a faded effect.

RUSSIAN EDGE SHAPE NAILS


Take a form and fold a crease into it down the centre.

RUSSIAN EDGE SHAPE NAILS


Fit the form under the the natural nails. Make sure you retain the crisp fold.

RUSSIAN EDGE SHAPE NAILS


Use crystal clear Nail Architecture acrylic to exetend the tip area forming a V shape at the end.

RUSSIAN EDGE SHAPE NAILS


Using the clear acrylic build the nails to the correct structure.

RUSSIAN EDGE SHAPE NAILS


When the acrylic has set remove the forms and begin to shape the nail with a file. File in the upper arch first eliminating any bumps in the application.

RUSSIAN EDGE SHAPE NAILS


File the side walls very straight and the tip into a v shaped point.

RUSSIAN EDGE SHAPE NAILS


File the sides of the nail up in a 45 degree angle . file carefully to maintain the crisp angles of the central ridge of the nail extension. Perfect the shape with a file and then smooth with a white block. Brush away dust and cleanse of contaminants.

RUSSIAN EDGE SHAPE NAILS


I used a cocktail stick [toothpick] and acrylic paint to create the pattern. I choose opaque airbrush paint for most of my handpainted designs as they are thin but heavily pigmented.

RUSSIAN EDGE SHAPE NAILS


Apply the paint with the stick in a lacey pattern. Vary the design for each nail.

RUSSIAN EDGE SHAPE NAILS


Embelish the design with copper coloured paint. When the design is dry, coat with a layer of LeChat Protech gel top coat and cure in a 9 watt u.v lamp for 2-3 minutes. Finish the nails with LeChat cuticle oil.

RUSSIAN EDGE SHAPE NAILS


Final look. [client needed the forefingers slightly shorter for her work]

RETRO MOON MANICURE a la DITA VON TEASE


I did this set of nails very quickly on myself to go with an outfit for a fancy dress party. The theme was BURLESQUE. This moon manicure was very popular in the 1940's and is the style favoured by the world famous burlesque dancer Dita Von Tease.

MOON MANICURE


Prepare nails in the usual manner and then apply a thin layer of clear Nobility gel and cure for 2 minutes. Fit forms.

MOON MANICURE


Use clear Nobility gel to sculpt out the extra length required and bring the gel over on to the nailplate to form a level surface.

Cure for 2 minutes, cleanse and then remove the forms.

MOON MANICURE


Using nail clippers trim off excess gel. File the tips to the length and shape you require. Cleanse to remove the dust and contaminants.

MOON MANICURE


Take your dotting tool and pick up your gel. Draw on the moon shape as if you were using a ball point pen.

MOON MANICURE


Use a brush to apply colour gel up to the line of the 'moon'. Do one nail at a time, freeze cure for a few seconds and then go on until all are complete and cure for 2 minutes.

Apply a 2nd coat of colour gel with your brush. Avoid the moon area. Cure for 2 minutes.

MOON MANICURE


Apply clear Nobility gel and add an apex for strength and support of the extension. Cure for 2 minutes.

Apply LeChat gelee clear top coat for extra shine and strength. Cure 2 mins. Wipe away the inhibition layer with gel cleanser.

FINAL LOOK-MOON MANICURE


HOW TO APPLY A COLOUR GEL OVERLAY WITH LECHAT NOBILITY SOAK OFF GELS.


Heres a tutorial for all those that have been asking. This is my tried and tested method, it always works for me. With a soft soak off gel you must pay particular attention to capping the ends of the nail as softer gel wears more easily and the seal is more readily broken and can lead to separation of the gel on the tip area. If the natural nails are a longer length I recomend that you apply extra clear Nobility in the final layer to build a vertical apex. This will reinforce the centre of the nail forming a strong 'spine' and reduce flexibilty slightly which will result in less movement of gel and natural nail and reduce the chances of separation at the tip further.

NOBILITY SOAK OFF COLOUR GEL


Heres what you will need....

LeChat gel cleanser

Nobility primer

Nobility clear gel

Nobility colour gel of your choice[pommegranate shown here]

LeChat gelee clear top coat [optional]

All available from www.lechatnails.co.uk

NOBILITY SOAK OFF COLOUR GEL


Prepare the nails by thoroughly removing all non living tissue. File the nails to shape and remove the shine from the nail plate very gently. Sanitise and dehydrate with the LeChat gel cleanser.

Apply the Nobility primer and allow to dry.

NOBILITY SOAK OFF COLOUR GEL


Apply a thin coat of Nobility clear gel. Work it into the nail well with the brush. Start at the tip and work back towards the eponichium overlapping the strokes , this prevents flooding the nail with gel. When the whole nail is covered lightly brush over the surface to level. Keep this base coat very thin. Be sure to cap all the free edges and always keep the gel off the surrounding skin.

Cure for 2 minutes.

NOBILITY SOAK OFF COLOUR GEL


Apply nobility colour gel of your choice, this shade is pommegranate.

Dont press hard with your brush, use light strokes. Pay attention to sealing all the free edges.

Doing 2 nails at a time ensures that the gel doesnt shrink away from the tips. Freeze cure for few seconds whilst working on the opposite hand and give a full 2 minute cure when all the nails are done.

Apply a second coat of colour gel and cure for 2 minutes

Now add a coat of nobility clear gel and give a further 2 minute cure.

[optional] You may now put on a coat of the clear gelee top coat [from the LeChat powder gel range] for additional strength and shine.

Cure 2-3 minutes and remove the sticky layer by cleansing with the LeChat gel spay cleanser.

NOBILITY SOAK OFF COLOUR GEL


Make completely sure you thoroughly seal the free edges of the natural nails when you apply the gel. All gels shrink slightly as they cure and failure to cap the edges leads to separation of the product from the tip of the nail.

NOBILITY SOAK OFF COLOUR GEL ON NATURAL NAILS


The final look.

Thursday, 15 January 2009

NOBILITY SOAK OFF GEL COLOURS


3 additional nobility soak off gels that were not featured on the previous colour chart. colours have come up slightly lighter on screen than actual shades.

left to right...


silk sheets

candy kisses

fireglow

COLOUR CHARTS


LECHAT NAIL ARCHITECTURE GLITTER ACRYLIC [colours have come up a little lighter on screen than actual shades]


top to bottom


dessert sun

no limit

high roller

room service

the strip

jackpot

showgirls

luxury

hotel suite

casino floor

headliner

COLOUR CHARTS


LECHAT NAIL ARCHITECTURE COLOURED ACRYLIC [colours have come up on screen a little lighter than actual shades]


top to bottom


night shade

sweet cherry

ocean escape

tangerine glow

sweet sapphire

aloha green

belgian chocolate

sun bright

party pink

caribean cocktail